How to Create a Cryptocurrency: Part 1

Why would you want to create your own cryptocurrency?

I don’t know, I’m not you.

But what I can tell you is why I made my own: for fun.

Now, there are some truly legitimate reasons to make a cryptocurrency, but let’s save that for another blog post.

In my opinion, creating a cryptocurrency is now like building a Hello World page when you first start to code – it’s a great foundation and gets you started with a new skill, but we have so many it’s a bit of a running joke now.

With that in mind, here’s the gist of what needs to happen in order to create your own cryptocurrency.

  1. Download Ethereum’s Mist client
  2. Load some Ethereum on it
  3. Paste some code
  4. Publish

Sounds pretty simple, right?

It is. It’s really that simple.

So simple, that there are (of course) tools that automate all of that for you in one click.

But you’re here for something more .. in depth.

If you just copy and paste some code or use a one-click launcher, you won’t really understand how your new cryptocurrency works or how to make it better.

Let’s learn together.

Basic Cryptocurrency Principles and Definitions

First, let’s tackle the basics in the context of the Ethereum blockchain.

Protip: Since we’re publishing our cryptocurrency on top of an existing blockchain, it’s technically called a token. If we had our own blockchain, it would be considered its own (alt)coin.

Blockchain

Think of it like a group chat – we all have a copy of the history of every message and can add new messages ourselves – but we can’t go back and change any messages.

The blockchain is the history of every message while the messages are transactions that contain simple actions like “send tokens” or complex ones like “publish a smart contract”.

Since the entire history is stored, we can always refer back to any message and trust that it is accurate.

Address

Much like it sounds, an address is where something is located on the blockchain.

It looks like this 0xE798e24428621C24f40C48A70E……

If you wanted to send some ether to your friend, it would come from your address and go to their address.

With the Ethereum blockchain, every address can store ether – this is called the balance.

Ethereum is different from Bitcoin because it can also store the code from a smart contract.

Protip: Smart contract addresses are special because no one person owns the address. Be sure to add code into your smart contract that makes it accessible from your personal addresses.

Transaction (Tx)

A transaction is just a public message added to blockchain that says four things:

  1. Which address it’s going to
  2. Which address it came from
  3. How much ether it wants to transfer
  4. Additional data payload (like smart contract code.. we’ll cover this later)

Through Mist (or apps like Coinbase), when you send/receive coins they’re actually packaged in a transaction and stored in the blockchain.

This history of transactions on the blockchain allows us to ultimately come to an address balance.

Smart Contract

A smart contract is a bunch of code that lives at a special owner-less address on the blockchain.

It’s completely public, but the code can prevent/allow access to certain functions to a limited number of addresses.

For example, our cryptocurrency smart contract will allow users to send tokens from their own address, but not from others.

Smart contracts also have a balance and even a storage system for keeping track of data.

We’ll be diving deep into this throughout our tutorial.

Protip: A DApp (Decentralized Application), at a basic level, is just a collection of smart contracts that interact with each other. They can be as simple as a cryptocurrency issuance or as complex as payroll or voting.

Mist

Mist is Ethereum’s desktop application for managing your addresses (accounts) and smart contracts.

It can sync up with the main Ethereum blockchain (real money), with its test blockchains Ropsten/Rinkeby (fake money), or even a local blockchain you made on your own.

Mist is how you will deploy and interact with your new cryptocurrency smart contract – download it from Github.

Note: It can take a little while for the blockchain to download onto your computer, so be patient when it first loads.

Overview of Creating a new Cryptocurrency Token

Let’s talk about the broader context of what we’ll actually be doing. We’ll dive deeper a bit later.

First, we’re going to download and initialize Mist

Mist is our connection to the Ethereum blockchain.

It stores our ether, publishes smart contracts, and can technically even browse the internet.

Download it, connect to one of the test networks (so we can try it for free), and wait for a while as it downloads the blockchain.

Meanwhile, we’ll create a Mist account, head to the test faucet, and send some free ether to your Rinkeby test account. (no, it’s not real ether)

After the blockchain is finally downloaded, we get into the code.

Next, we’ll write a smart contract

This code needs to contain all the necessary pieces of our new token because we can’t edit it once we deploy.

The code will include the coin’s name and functions for creating an address framework, minting coins on launch, sending coins from one address to another, and even burning coins from existence.

Then, we send it to the Ethereum blockchain via a transaction

In Mist, we’ll package our code in a transaction and send it to the blockchain for processing.

Like any transaction, it will cost ether. Luckily, the test networks offer free ethereum for testing.

Once the transaction is confirmed, we will be given the address where the contract lives. This is the address where all transactions will be sent to in order to send your new token.

Finally, we’ll send some tokens from one Mist account to another

Since our smart contract is publically available on the blockchain, we can send transactions to it that modify address balances and effectively “send” cryptocurrency to one another.

Luckily, Mist handles this pretty seamlessly so you’ll be able to do it right within the Send panel.


Enough overview, let’s get started .. in the next post!
 

Why “Cryptojacking Malware” is exactly what you want on every website

I’ve only ever clicked on one ad.

Congratulations to the Otter Box social media retargeting team, they reminded me to order a phone case that I’d meant to order for 3 months while I left my iPhone unprotected.

The rest of the 5005000 ads I see per day are simple wastes of screen time, my attention, my battery, my data, and my patience.

I am literally paying to see ads when up to 79% of a webpage’s size could be advertising and tracking codes.

Months and months of phone bills and overage all for the sake of that one single advertisement that might make it through and convince me to purchase.

We gave ourselves no choice

Publishers continue to struggle with monetization of their content.

Every day I consume content from bloggers, web cartoonists, photographers, videographers, gurus, and more and I don’t pay them anything. Nothing.

In exchange for free content, publishers hosted advertisements on their sites to help monetize their crafts.

I don’t pay anything, but they still get paid. It was a win-win.

But somewhere along the line, we got fed up with advertisements and installed Ad Blockers.

Faster load times, less eye strain, no distractions – an excellent content consumption experience.

All at the expense of the publisher of course who now struggles more than ever to make ends meet.

On top of that, if they try to block our access and ask me to whitelist their site to allow ads, I either don’t bother, actively avoid, or even treat the brand with disdain.

So how can we have our content and eat it for free?

What if you spend that same 79% of ad load… no, make it 10%…

What if you could spend 10% of a page’s load and a bit of battery generating a small amount of cryptocurrency for the publisher.

You get no ads, smaller data fees, and support the publisher without pulling out your wallet.

Seems like a no brainer…

Sounds cool, but what is it?

In general, this process is called cryptocurrency mining.

Specifically for websites, it’s just called browser mining.

In short, the mining script (aka miner) is doing a whole bunch of math and needs computer (CPU) power to do it. The more power the better.

It doesn’t use any private data, it doesn’t download anything to your computer, and it certainly isn’t stealing your money.

So, if all it does is use some of your unused CPU power, what’s the problem?

Well, like anything, stupid people are ruining it.

Now labelled as a ridiculous “Cryptojacking Malware”, this type of simple monetization strategy has been stained repeatedly by people trying to abuse consumer trust.

Typically, they introduce it with high CPU rates and without user consent.

Mining at too high a rate will cause your electricity bill to increase and your computer to slow down, freeze, or even crash.

Also, let’s stop for a minute and address what a terrible misnomer “Cryptojacking” is. It makes it sound like cryptocurrency theft. NO ONE IS STEALING YOUR CRYPTOCURRENCIES. Though abusers make be taking a disproportionate amount of your data limits and CPU speed, nothing is compromised or stolen. It’s not even malware – it doesn’t live on your computer, only in the browser.

So, it makes me so furious to see people abuse it and then media following up blaming the technology with this misnomer.

And now, these mining scripts are just being outright banned by the Ad Blockers they are meant to work together with. Ironic really.

This is a real solution that needs to be guided and implemented in a fair way for everyone.

What needs to happen next

Ideally, browser mining needs to integrate with the browsers.

Chrome has already begun throttling tabs that cause resource burn, but what we need is a browser hook that allows a site to say “hey, I’m running a browser miner, allocate me resources according to protocol or user’s settings”.

Instead of a hard ban on browser mining, we need browsers to include options for consumers to opt-in to this amazing and liberating feature.

Think of settings like:

  • Enable/disable browser mining
  • Set max % CPU power allowed for mining
  • Whitelist/blacklist publishers
  • Select priority of publishers
  • Mine for publishers while not engaged in their content
  • Mine in the background and use payments later

Help me Chromey-one Kenobi, you’re my only hope!

Though Chrome is set to block annoying audio ads, Google is still a member of the Coalition for Better Ads and their primary income by far is advertising.

Since advertising is directly threatened by browser mining, don’t expect movement from Chrome anytime soon.

And though Mozilla Firefox has at least started to build in ad-blocking, we have a long way to go before these types of browser mining integrations exist.

At the very least, we need to share a better understanding of what exactly “Cryptojacking” is so we can support better online experiences and even support charity.

Comment below with your thoughts and questions!

Ledger Nano S Cryptocurrency Hardware Wallet Review

Today is an exciting day: my Ledger Nano S has finally arrived!

For those that don’t know, the Ledger Nano S is a cryptocurrency hardware wallet meant to store your coins safely off the internet to keep them less prone to hacks, exchange theft, or software failure.

I bought mine because I don’t trust keeping my coins on an exchange and because my laptop has been acting up and crashing frequently.

So instead, I’ll keep my coins safe on this little USB stick.

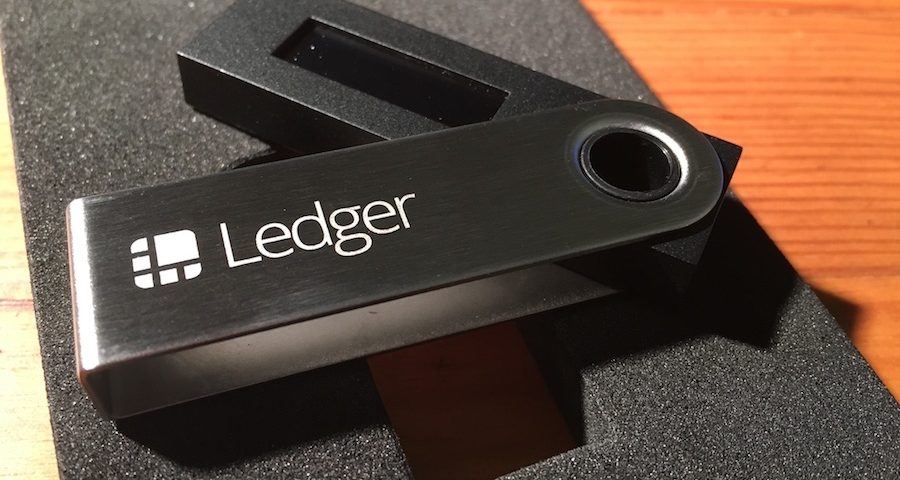
Ledger Nano S – Money Shot

AND in case I lose or destroy it, it has a 24 word seed that I can use to restore my wallets on any other Ledger product.

TL;DR

This wallet was super easy to setup, intuitive to manage, built solid, and feels like an Apple product. I highly recommend it to investors of all calibers. Buy it now.

Quick Timeline

I bought the Ledger Nano S for about $100 straight from the manufacturer in France.

Ordered – Dec 21, 2017
Shipped – Jan 2, 2018 (via La Poste Colissimo)
Arrived – Jan 8, 2018

This was before they announced a 3 month product delay, so pre-order now while you can.

The Physical Product

The product package measures 5″ x 3 1/8″ x 1 1/8″ and came shrink wrapped as a nice touch.

Ledger Nano S – Packaging

As expected, the Ledger Nano S is extremely light and is about the size of any USB thumb drive (~2 1/4″ long).

Opening up the package felt super satisfying in the same way it feels to unbox an iPhone.

Ledger Nano S – Unboxed

The wallet itself it smooth and shiny, but easily takes fingerprint smudges. Inscribed on the back is “Vires in numeris” – Strength in Numbers.

Also included is a small welcome packet including instructions on setting up your device, a note about device security, and a blank 24 word seed store card.

Ledger Nano S – Seed Card

Though I probably won’t be swinging mine around on a keychain, they do provide a small key chain and even a lanyard – and a micro-usb to usb connecting cable of course.

Ledger Nano S – Everything Included

Working with the Device

Once connected to my computer, the Ledger Nano S lit up and scrolled through some basic instructions on setting up the device.

The device itself only has two buttons on it, but the Ledger team made their app very intuitive even with just two buttons to work with.

Note: the device itself doesn’t turn on without being connected to your computer, so don’t go pressing buttons with hope.

The startup sequence was actually quite short.

First, you select a 4-8 digit pin for use in unlocking your device. This pin can be changed or even randomized in the device settings.

Then, you are taken through the seed generation process. One by one it shows you your 24 word seed. Make sure to write this down in triplicate and store them safely – these are your lifelines in case something goes wrong with your product.

After it takes you through the initial 24 words, it will prompt you to confirm 2 of the words’ orders – like “select word #19″. This acts as the final stage in setting up your device.

Then you’re all done with setup! Once authenticated with your PIN, you can navigate through to the default applications: BTC and ETH wallet.

I didn’t want to risk my BTC to start, so I opted to add Ripple.

Adding Ripple to the Ledger Nano S

Note: Though I don’t go over it here, you would take the same steps to work with BTC etc – download the Ledger Wallet BTC and navigate to the corresponding app on your device.

By default, the Ripple wallet app is not installed on the Ledger Nano S.

Luckily, it’s very straightforward to do so.

First, download the Ledger Manager app through chrome. It was a bit weird for me to do this the first time because it’s a chrome extension that acts like an application on your computer.

Open it on your computer, then connect your Nano S and unlock it with your pin. This should prompt the Ledger Manager to unlock itself and present the dozens of wallet apps you can install.

Ledger Manager

It took me a couple tries, but finally the one-click Ripple wallet install worked.

Now that my Ledger Nano S had the Ripple wallet app installed, I needed to download the Ledger Wallet: Ripple onto my computer.

This chrome application, just like the Ledger Manager, is installed on my computer and only unlocks once your device is plugged in, authenticated with PIN, and has the Ripple app open.

Once it’s unlocked, you can easily see your Ripple address, send coins, and check your balance. It even generates easy QR codes and allows you to print or even send via email.

Ledger Wallet Ripple

To confirm how easy it was, I downloaded Ledger Wallet Ripple on an entirely new computer, plugged in my device, and confirmed that my Ripple was safely stored.

Final Notes

I love this product!

It was sold to me for a fair price and delivered in a fair amount of time for an international shipment.

It has an intuitive UI, was incredibly easy to setup, and the Wallet apps are incredibly simple yet refined.

That being said, it does have some room for improvement.

It does not support every crypto wallet at this time – though new wallets are being created and rolled out. For me, that means my XRB and REQ are not compatible yet.

At this time, the Ledger Manager does not show a list of the apps I have installed or provide any settings for those installed apps – though I can select and manage settings for these apps on the device itself.

Vastly small improvements compared to the value you’re getting with the Ledger ecosystem.

Maybe one day I’ll be lucky enough to upgrade to a Ledger Blue.

Getting Started with Bitcoin

A number of people continue to ask me how to get started with cryptocurrencies.

  • How do I buy Bitcoin?
  • How much should I invest?
  • How much have you bought?
  • Which coins should I invest in?
  • What would you spend $100 on?
  • What’s the blockchain?

I wanted to jot down some fundamentals here that should hopefully answer any questions you may have about cryptocurrencies and beginning to get involved.

Bitcoin, though it has seen explosive growth, is a highly speculative investment. Please do not bet the farm. We’ve seen people taking out mortgages in order to buy Bitcoins – this type of behavior en masse could lead to a global depression. Bet only what you can afford to lose.

How to buy Bitcoin

Currently, the easiest and safest way for a beginner to get some Bitcoin is to create an account on a Cryptocurrency Exchange. Use Coinbase to start and move on to explore other exchanges as you begin your exploration into other coins.

At present, you will need to verify your identity and provide credit card or banking information. Be smart when handing over this information and try your best to hedge against the worst case scenario – like your information being stolen or misused.

This leads us to a very important topic:

How to protect your Bitcoin (and other coins)

If you leave your coins on an exchange, you are asking for pain.

Please, please, please do not underestimate this advice. We have seen time and time again people losing all their money because they did not store their coins in a wallet.

Either download a software wallet to your computer or purchase a physical hardware wallet to store your coins safely off the exchange.

Each cryptocurrency will have its own supported wallets, so do some research online to what is supported. For Bitcoin, I use Electrum software wallet and the Ledger Nano S hardware wallet.

How much you should invest

Imagine you go to a casino. You see the roulette table is getting some great action. Everyone at the table has bet on black and won all night long – doubling, tripling, 200x’ing their money.

How much would you bet on black, knowing full well that it could land on red?

How much I have invested

Somehow, this is a question that comes up within 5 minutes every time. Most likely born of a natural curiosity, this question is deeply personal to me akin to asking how much money I have at all.

Instead of asking someone how much money they have, ask them which price points they managed to buy in at or how their portfolio growth has been. This is a bit more exciting and revealing of a conversation in many regards and will not offend someone who is protective of their assets.

What other coins should you invest in

One of the big problems I see is a lack of understanding of the core problems each cryptocurrency solves. Instead, people focus on the ROI of their investment.

This same mentality led to the .com collapse because we threw money at any website with page hits. We all now know that page hits aren’t gold and that same principle should apply here.

Go and research the different technology behind the coins and justify whether it has legs – otherwise it’s a gamble.

Personally, I believe Ethereum has a solid foundational technology that has tremendous applications. Remember, cryptocurrency is a byproduct of blockchain technology.

The blockchain and how it related to cryptocurrency

Most of the cryptocurrencies you’ve heard of are primarily transactional blockchains – meaning they are built to send money from A to B etc.

But blockchains can be so much more – from renting a car to registering land rights.

Cryptocurrencies are a way of incentivizing computer power to be spent on maintaining a blockchain. If the blockchain is good, the crypto is a good long term bet.

If the blockchain is only solving for cryptocurrency, it better do well otherwise it will be defeated by competition, just like any product or service. There is a lot of competition.

Should you get involved with mining

Probably not.

Mining on your computer is obsolete and setting up your own rigs is a complicated task even for people who’ve built a computer before.

Beware of cloud mining contracts as there’s hardly a way to determine if it’s a Ponzi scheme or not.

This is a buyer beware, wild west market. Be careful and be prepared to lose money.

How to Add Referral Tracking System with Laravel

This tutorial was created with Laravel 5.5 on a fresh installation and could be considered outdated.

Referral affiliate tracking seemed like something that would be a pretty common development addition to Laravel, but I did not find much in the way of tutorials to guide me 100% of the way there.

This tutorial will walk you through creating functionality in Laravel that will allow your users to share an affiliate link that will give them credit for new users that register with your site. The principles described here should allow you to extend this tutorial to fit other referral needs.

Many thanks to Andy Brudtkuhl’s guide that brought me 85% of the way there; here is the extra 15%:

1. Setup the DB & Migrations

We’ll need to have at least the base auth scaffolding implemented

php artisan make:auth

Next, let’s generate a new migration that will add a new column to our User table.

php artisan make:migration AddReferredByToUsersTable

In this migration, just add a nullable integer called referred_by. We’ll just be setting the referrer’s user id as the referred_by value for simplicity’s sake.

Schema::table('users', function(Blueprint $table)
{
  $table->integer('referred_by')->nullable();
});

and make sure to drop it nicely

Schema::table('users', function(Blueprint $table)
{
  $table->dropColumn('referred_by');
});

Then, run your migration and check your DB to see that the columns are all set.

php artisan migrate

Protip: Make sure you add referred_by to the $fillable array in the User model (app/User.php), otherwise you’ll see some breakage.

2. Generate Referral Links

Easy peasy, just echo out the current logged-in user’s id appended to your url. The middleware we’ll build can catch it anywhere on the site, so feel free to customize this or build it into a helper function.

Stick this inside a view of your choosing.

@auth //only show for logged in users
  <input type="text" readonly="readonly"
         value="{{ url('/') . '/?ref=' . Auth::user()->id }}">
@endauth

The ?ref value will be what the middleware checks for.

3. Bake Cookies with Middleware

Now let’s create a new cookie if someone visits the referral link. We’ll later use this cookie to update the database during user registration.

For those that aren’t familiar with it, middleware basically runs as a filter for HTTP requests.

This means we can add new middleware that will check to see if we’ve added ?ref to the url and then set a cookie if we don’t have one already.

php artisan make:middleware CheckReferral

After we create our middleware, we need to register it in the kernel (app/Http/Kernel.php). We can specify certain routes or add it to a middleware group, but for this case a simple global registration is sufficient.

Add "\App\Http\Middleware\CheckReferral::class" to the end of the $middleware array.

Now, let’s create that cookie by adding some simple functionality to the new middleware file.

Replace the default handle() functionality with this:

$response = $next($request);

// Check that there is not already a cookie set and that we have 'ref' in the url
if (! $request->hasCookie('referral') && $request->query('ref') ) {
  // Add a cookie to the response that lasts 5 years (in minutes)
  $response->cookie( 'referral', encrypt( $request->query('ref') ), 525600 );
}

return $response;

Protip: By default, Laravel uses encryption in cookies. Use encrypt() to pass values to cookies, otherwise you won’t be able to retrieve them later on. Otherwise, you’ll need to add the cookie name to the $except array in the EncryptCookies (app/Http/Middleware/EncryptCookies.php) middleware.

Now, our registered middleware will check the url for ?ref and create a cookie.

Try it now: Navigate to a the referral url you generated in your view earlier. Then, check your developer tools to see if the cookie has been set. In Chrome, this is currently under the Application tab of the Developer Tools.

4. Assign the Cookie Value During Registration

So, now that our User model can have a referrer_id assigned to it and we have the referral cookie set, let’s finish this up by adding the referral cookie value to the referrer_id during user registration.

Fix up the default create() function in RegisterController (app/Http/Controllers/Auth/RegisterController.php) to look like this:

protected function create(array $data)
{
    $referred_by = Cookie::get('referral');

    return User::create([
        'name' => $data['name'],
        'email' => $data['email'],
        'password' => bcrypt($data['password']),
        'referred_by' => $referred_by,
    ]);
}

If you’re feeling protective, look into validating that $referred_by is a real user id. Remember, this value can be null and by default Cookie::get() will return null if no value is detected.

You’ll need to import the Cookie facade here to use that function.

use Illuminate\Support\Facades\Cookie;

Try it now: After navigating through a valid affiliate url (and confirmed the cookie is set properly), register a new user and confirm that the referrer_id has been set in the database for the new user.

Now what?

Well, that’s all for the sake of this article. Getting into awarding referrals tends to split dramatically from here on out depending on what you’re trying to accomplish.

At the very least, you have a foundation where you at least know who referred who.

Let me know if you have any questions or improvements in the comments below, particularly if you:

  1. Know how to register the Middleware to automatically encrypt cookies without the use of encrypt()
  2. Feel strongly that we should use a hashed user id for referral links.
  3. Got lost anywhere along the way.

Unity Blockchain – Democracy without Dollars

What if you could instantly pull live stats about voter positions – to immediately retrieve the pro/anti numbers for any given issue or even legislation.

As a voter, I would prefer to set my positions and have the legislation check against the data in decision making rather than continually comment on everything about how I feel.

I want to mark down where I stand on gun control, birth control, minimum wage, net neutrality, war, etc almost like a voter profile instead of being considered a blank slate every time new legislation appears.

To take it further, this profile could even be used to automatically cast my vote on issues – particularly if they are simple.

The Blockchain

Blockchain technology allows us to continually maintain all of these voting profiles without the need for a centralized server system or single point of failure.

For the sake of accessibility, this platform would utilize widespread master nodes that would house the entire blockchain while smaller nodes could simply interface and signal to the master nodes – even just by using a mobile app.

The blockchain would also handle adding new voting positions as well as smart contracts – perhaps even building on top of ethereum architecture.

Issues

Voter fraud is the first issue. It’s a classic tech problem in how to preserve unique sessions. How can we truly confirm that a single voter profile is attached to a single verified voter?

The second issue is blockchain maintenance. How do we encourage the constant use of master nodes? The typical answer is to throw a cryptocurrency in the mix and call it a day, but introducing money into this will likely not be healthy. Perhaps the government itself could maintain master nodes. This position could also help resolve voter fraud.

Adding new smart contracts and new voting positions to the blockchain presents its own challenges as this would ideally be a completely democratic system, but at the same time we need to control bloat from entering the blockchain. For new positions, perhaps signals are sent from smaller nodes in unison until a consensus happens at which triggers the new position to be added. The position can then be selected in individual voter profiles.

Thoughts?