Working for a WordPress Theme Shop has been one of the most influential experiences of my development career. Not only am I responsible for solving client problems, but I’m also responsible for learning how to solve those problems myself. I’ve learned a tremendous amount about what stumps users, what they want, and ultimately how to correctly respond to any support question – even if it’s never been asked before. I attribute most my knowledge to working as a WordPress Theme Shop Customer Support Agent and am truly stunned at all the lessons I’ve learned the hard way.
1. Live for the fix
The most gratifying part of being a custom support agent for me is solving the problem for a customer. If I can easily make their day better with a few lines of code that they would never have figured out, it honestly makes my day better too. Reading the words “omg thank you so much!!” brings a smile to my face every time and pushes me to try harder to fix the next problem. I reply to every comment, letting them know that I’m here to help them with any issues and adding emoticons when they really make my day. Even if I don’t know the answer, the least I can do is ask for additional information so the user feels looked after. It’s important to me that the user is happy, because when I need customer support, I want the same level of respect and dedication.
2. Assume they know nothing
There is no such thing as a stupid user, only inadequate directions. Assuming the user knows what FTP is or where to add CSS code is one of most basic mistakes I still manage to make. While it only may lead to another response or two on the support thread, it could add hours to the time before a user’s problem is solved. On top of that, when a user doesn’t know what to do or where to navigate, it leaves them feeling lost, impatient, and even angry. No bueno.
Being thorough and providing specific step-by-step directions is the best way to ensure a user can follow through and resolve the issue. For common questions, like ‘What is FTP?’, it’s very useful to just link them to a codex entry on the topic in your response. For example:
open custom-functions.php and change ... to ...
should be:
-
FTP to server.
-
Navigate to wp-content>themes>theme-folder>framework and download custom-functions.php
-
Open it in a text editor
-
Change code ... to ...
-
Upload & replace the file on your server
3. Know every codex entry by heart (and slug)
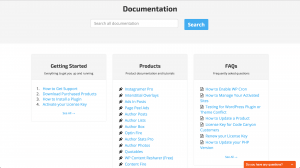
Most of the time, users will require the same set of directions to solving a problem. Linking them directly to a codex entry with the steps to the fix is far more effective than re-typing the solution over and over again. That’s why it’s important to know what’s in your codex and to create codex entries for common issues. Knowing the slug of the codex entry is awesome for quickly linking to those common questions without having to search them every time, though it may be harder for super-SEO-taxonomized codex entries.
One time, Google Adwords updated their code so that it was incompatible with the Ad fields in our theme options. While we were working on a fix, a number of users were still affected by the change and created support threads. I did not create a codex entry and spent a lot of time detailing the solution for a number of users before I facepalmed at my mistake and created one. It saved me countless hours more than the time it took to create the entry. Lesson learned.
4. Have infinite patience
Sometimes, things break. When things break, users get mad. When users get mad, they use choice language. When users use choice language, I don’t like it. Though I don’t fight fire with fire, it is certainly off-putting and I wish I could reach across the internet to smack some sense into them. After all, I’m here to help you, there’s no need to be rude. This is where infinite patience comes in handy. Even if the user makes me mad, I try to step out of the moment and put myself in their shoes. I’ve been frustrated before, especially when something simple doesn’t work. I try to envision how I would want customer support to respond, even if I were angry. Empathy is the key to bringing me back to a place of level-headed helpfulness and even to go above and beyond to resolve the issue. I secretly prefer solving angry user problems because it’s gratifying to bring a bit of peace to someone who probably has a lot more on their mind.
5. Test your code before you recommend it
If you’ve ever tried out some code and then get white-screened, you know how terrifying it can be. Now imagine white-screening someone else’s live website because you missed a closing php tag. In short, they aren’t too thrilled. Even simple stuff like a css color fix can cause users to get upset if it doesn’t work. Sure, it was only an id selector instead of a class, but they don’t know the difference. And because of this simple mistake, and the lag time between thread responses, the fix takes hours longer than expected. In terms of user experience, you may have just lost a client. So, as I’ve learned the hard way, always check your code before you recommend it to someone else.
6. Stay up to date on library updates and bugs
WordPress isn’t perfect. Neither are themes or plugins. And they sure aren’t perfect together. Pile jQuery conflicts and deprecated functions into the mix and you have a recipe for some broken elements. It’s important to know when new releases of product are shipped, but it’s even more important to know what breaks with them. I remember when WordPress 3.7 launched there was an issue with default category menus because the exclude-category function failed. I thought it was an issue with the theme, but a quick look through some of the wordpress.org threads informed me that it was a 3.7 issue. If I hadn’t gone through the support forums, I could have wasted a lot of time trying to solve the problem within the theme, when it was something that was not broken in the first place.
7. Write in the plainest English possible
Writing grammatically correct English is important to me. It facilitates better communication and enables me to explain myself in full. However, most of the world does not speak English, and certainly not as a first language. Furthermore, some English doesn’t translate well into other languages or at all. Since a hefty percentage of our users are not native English speakers, it became very apparent that simplicity was my best friend. Writing for translation software is the best way to avoid redundant explanations. Useless directions like ‘You’ll need to navigate to the theme options then open custom styling etc..’ quickly became terse bullet points like ‘Go to Theme Options>Custom Styling’. Using capital letters, periods, lists, dashes, and semicolons became a common tool for segmenting sentences so that a user could see the split between directions. Turning long sentences into short, broken instructions is the best way to communicate over the language barrier.
8. Never Close a Support Thread
I may seem counter intuitive, but closing threads can actually make life more difficult. Users often have similar issues, but might want to ask different questions on the topic. If I were to close a thread, they would then open a separate thread, maybe link back to the original thread, and ultimately cause confusion somewhere down the line with fixes, external links, and duplicate search results. Leaving the thread open allows users to continue the discussion on fixes and allows them to communicate if a fix breaks or even contribute alternative solutions. Personally, I hate when a thread on wordpress.org is closed because I can’t ask further questions about a fix, especially when closed threads pop up as the first page of google search results. Closing threads leaves them out of date, shuts down nuanced discussion, and doesn’t play nicely with user experience.
9. Don’t be afraid to call for backup
I was hired to take the load off of the theme developers, who were serving as support agents as well. Most of the time I can handle the support threads, but sometimes a tough question will stump me. For a while, I was too proud to ask for help – I didn’t want to appear as if I couldn’t do my job. This only resulted in wasting my own time and, more importantly, the user’s. Now, instead of banging my head against the problem, I elect to bring in some experienced help from the theme developers. Not only will they be able to sort out the problem quickly, but I’ll also be able to learn from their solution on how to attack the problem in the future.
What lessons have you learned while working with WordPress?


